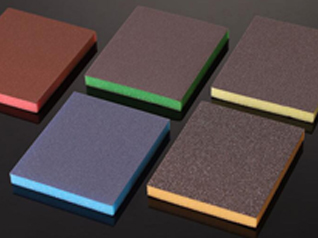
Abrasive sponges are foam sponges impregnated with various sizes of grit, allowing one to use the sponge as a sanding tool to smooth various surfaces. Many hardware and craft stores come with sanding sponges and accessories, such as holders designed to make them easier to use, and they can be a useful tool around the house or workshop. Sanding sponges are often used to complete the process of plasterboard.
Just like traditional sandpaper, sanding sponges come in different texture levels, from fine grit to very coarse grit. When you want to start preparing a painting project, knowing what it is, what it consists of and how to use it properly is the key to success. So, let's get started without delay by answering the basic questions ......
An abrasive sanding sponge is nothing more than a block of foam covered with sandpaper on all sides, including the edges.
Most of them have a fine grit on one side and a medium grit on the other.
There are even double grit (and double angle) sanding sponges, which vary in function.
These abrasive sanding sponges can be used depending on the project you have at hand.
While double grit sponges are great for larger projects that require switching between grit types, double angle sanding sponges are designed for projects that require sanding into tiny nooks and crannies.
These types of sanding sponges bulk are particularly well suited for sanding corners, trim and ceilings.
In addition, you will find them very useful when working with moldings and skirting.
You can use the blocks to sand flat or designed surfaces in dry or wet conditions.
Some products come with handles and even self-adhesive glue, making them very easy to use.
Most of the sanding sponges from popular brands are reusable. This means that they will last a long time as long as you can wash them.
However, once the abrasive sanding sponge loses its texture or grit, it can be discarded.
Knowing how to properly use an abrasive sanding sponge will help you finish your painting job with more precision and in less time.
It will also save you labor when working on a piece of furniture, hardwood flooring, cabinets or any other surface you are working on.
So, when you have your materials ready, you can start by following these steps ......
1. Wear safety equipment
Before using the sponge sand paper, wear a mask to avoid breathing in any airborne particles.
Also, wear goggles and gloves if needed.
2. Choose the right level
You need to find out the type of abrasive sanding sponge block you need for your project.
You can find out the grit of the sandpaper on the package. Remember, the higher the number, the finer the result.
You should not use extra coarse grit, as this can scratch the surface.
Instead, look for dry/wet abrasive sponges that can be used on different surfaces, including gypsum board.
Also know that different surfaces require different grit sizes of sanding blocks - although most abrasive sanding sponges are suitable for almost all types of surfaces.
However, it is important to check the packaging before you buy to ensure you are buying the correct abrasive sanding sponge block.
3. Start sanding
Once you have the abrasive sanding sponge blocks ready, you must sand the surface in the direction of the grain.
Start with a high to medium grit and then finish the process with a light grit sponge.
Clean the item properly after sanding, as the paint may not set on a dusty surface.
4. Wet the middle block
If you want to reduce the spread of dust and debris, wet the abrasive sanding sponge when applying it to the jointing compound.
Sand lightly on the surface to obtain a fine or medium appearance.
Scrub the item to remove surface texture and roughness. If the abrasive sanding sponge begins to clog, rinse the sponge properly.
How do you clean your sponge pads?
It is important to clean the abrasive sanding sponge after use, especially if you plan to reuse the sponge for the next sanding project.
Otherwise, dirt, debris and paint material will settle and clog the small holes of the sponge, making it impossible to sand the surface again.
▸ Blow air into the abrasive sanding sponge to remove any dry particles that have settled
▸ Use your fingers to try to remove any residual particles left on the surface
▸ Now soak and rinse the abrasive sanding sponge sheet with warm water to remove adhering dust particles
▸ If needed, you can use a little laundry soap solution for washing
▸This will help to finely clean the inner layer of the abrasive sanding sponge
▸Repeat the above process 2-3 times until you get the desired cleaning result
▸ Finally, squeeze the abrasive sanding sponge to let all the water out and let it dry naturally in the sun
Conclusion
Abrasive sanding sponges are great for any painting project because they don't scratch the wood as much as dry sanding does.
The good news is that if you clean/rinse the abrasive sanding sponge each time you sand to remove dirt and residue, you can make your work last long enough to reuse it many times.
So if you are ready to paint and want to start prepping and sanding, abrasive sanding sponges should basically be part of your toolbox.
